written by NATÁLIA DOBIAŠOVÁ
I would like to gain a knowledge and be able to reflect on a new DTF Printing (Direct To Film Printing) machine known as DTF printer.
As I’m very interested in branding and designing clothes, I find it very interesting that people created a new machine with which you can print on almost any kind of fabric.
Nevertheless, it is very easy to use and very cost-effective machine. An even more interesting fact for me is that you can create a DTF printing machine out of a normal printing machine which we normally use for printing papers.
Moreover, I would like to find out how to create this type of machine, what are the advantages/ disadvantages, and lot more.
General Information About DTF Printing
“The digital textile printing industry has seen rapid growth since the last decades as more and more users shift towards the digitalization of the textile printing.
(Splashjet, 2021)”
The use of the digital printers allows people to instill ease, simplicity, fabric performance, consistency, and most importantly a huge variety of colors in textiles this making the whole process reliable and cost-effective as well.
A Direct To Film/ Foil printing, known as DTF is the latest inkjet printing method which involves printing design onto special films for transfer onto garments. It is an alternative printing process to Direct To Garment printing, known as DTG.
The most prominent factor that makes this process worthy of use across any other methods is the freedom to use it on almost any type of fabric. It can be cotton, polyester, silk or synthetic fibers such as rayon or terrycot and etc.
Furthermore, the DTF printer does not require a heavy investment for the user. The user needs to invest into a few things such as films, inks, hot-melt adhesive powder, software and printer.
Nevertheless, a user can be either selling just a printed films or can also sell garments with printed designs on it but in that case the user needs to invest into heat-press machine as well.
DTF Printer
DTF Printing is also referred to as Direct To Film Printing, and it works by printing transfers that are heat pressed to a variety of garments (and other substrates).
Equipment For DTF Printing
DTF Printer
A DTF printer is often called a DTF Modified Printers since a basic printer can be transformed into a DTF printer.
The printer is mostly the basic 6 color ink tank printer like Epson L800, L805, and the most common one L1800, etc.
The reason why these types of machines are being used is that these printers work in 6 colors. This provides the convenience of operation as the CMYK DTF inks can go into the standard CMYK tank whereas the LC and LM tanks (two middle compartments) of the printer can be filled with white DTF ink.
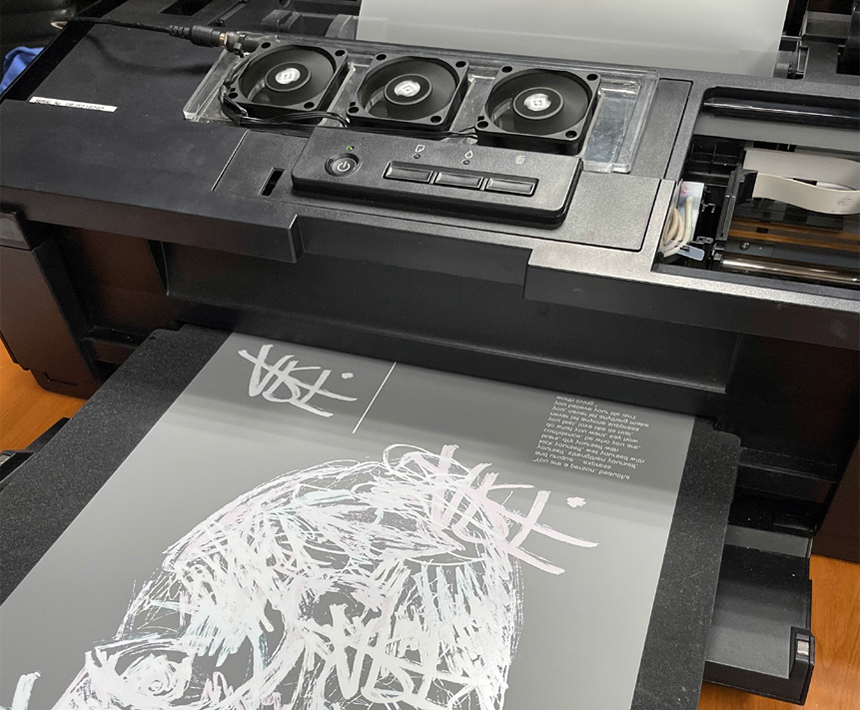
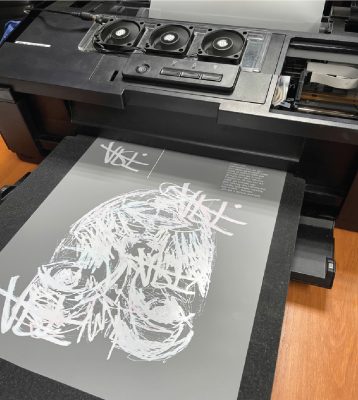
Furthermore, a few adjustments need to be made on the printer in order to work properly such as removing out the rollers which are used for sliding the paper. These rollers are removed to prevent the appearance of ‘linings’ on the while layer printer on the film.
DTF printer converted from epson L1800 printer.
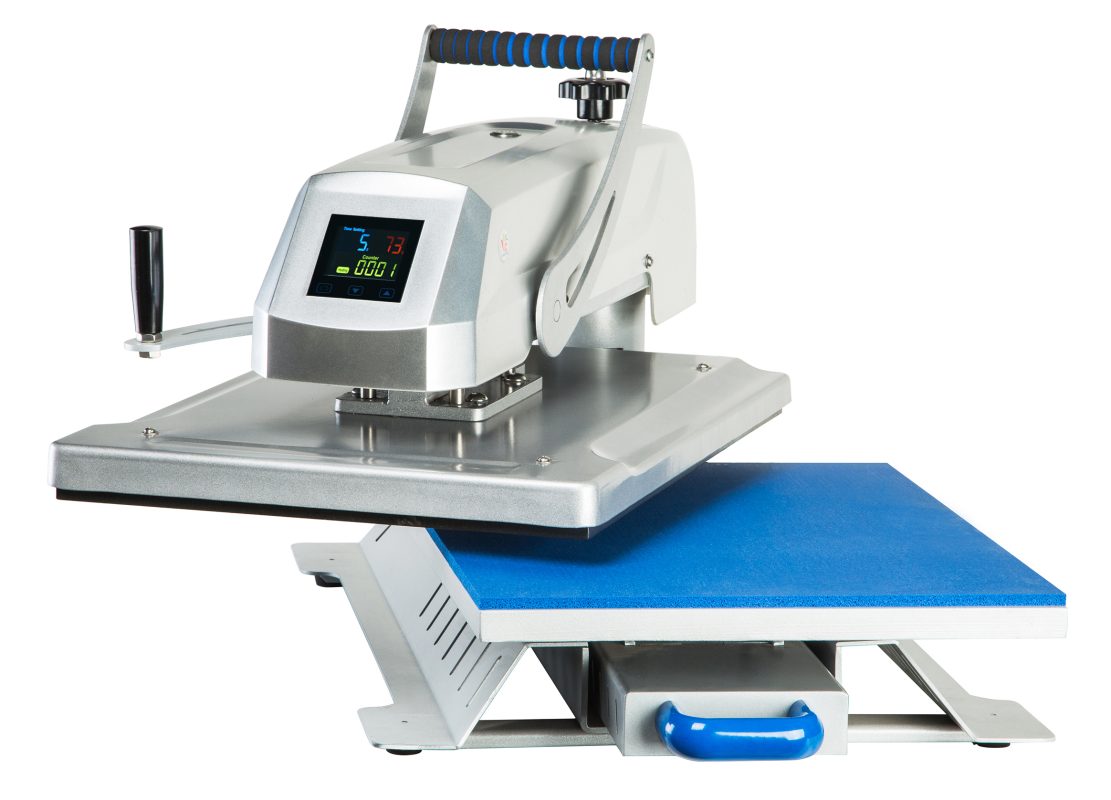
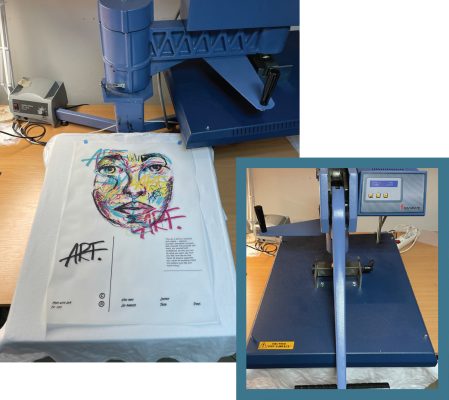
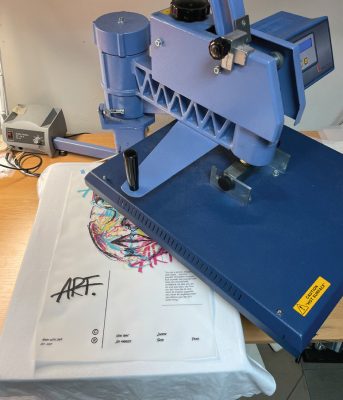
Heat Press Machine
The heat-press machine is mostly used for transferring the printed design from film to fabric.
As mentioned before, it can be also used as an alternative for melting the hot-melt adhesive powder on the DTF film.
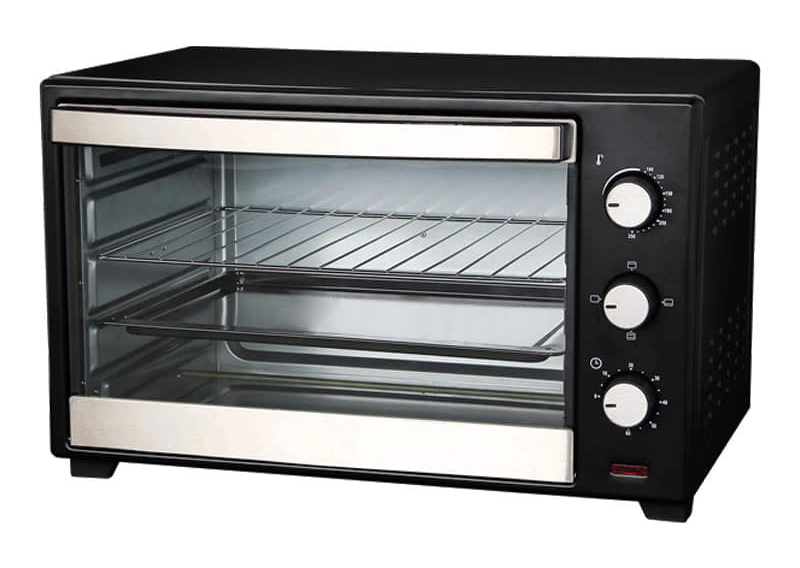
Oven
The curing oven can basically be a normal small industrial oven or small portable kitchen oven.
Oven is used to melt the hot-melt adhesive powder that is applied over the film with the printed DTF ink on.
A heat-press machine can be used as an alternative, but it should be used in no contact mode.
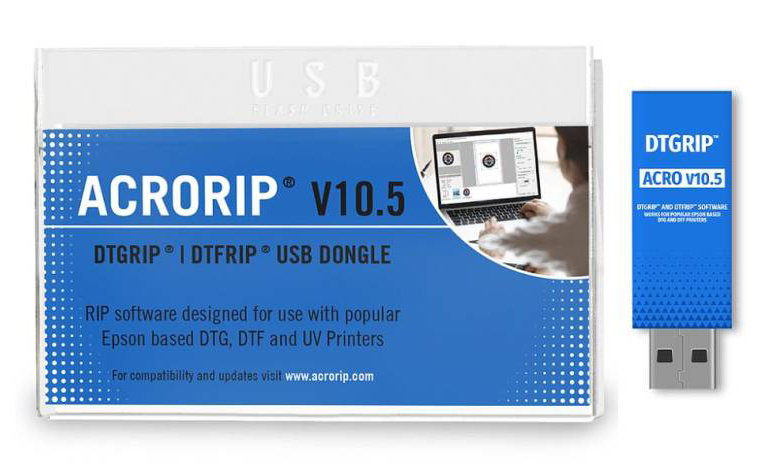
Software for DTF Printing
The software is the most important part of the whole process.
A DTF printing requires a specialized RIP software that can handle CMYK and White colors.
The print characteristics, color performance of the inks as well as the overall print performance on the film are influenced by the RIP software.
Every aspect of the printing can be adjusted such as color profile, ink levels, drop sizes and other factors contributing to an optimized print results are all governed by the software.
Materials
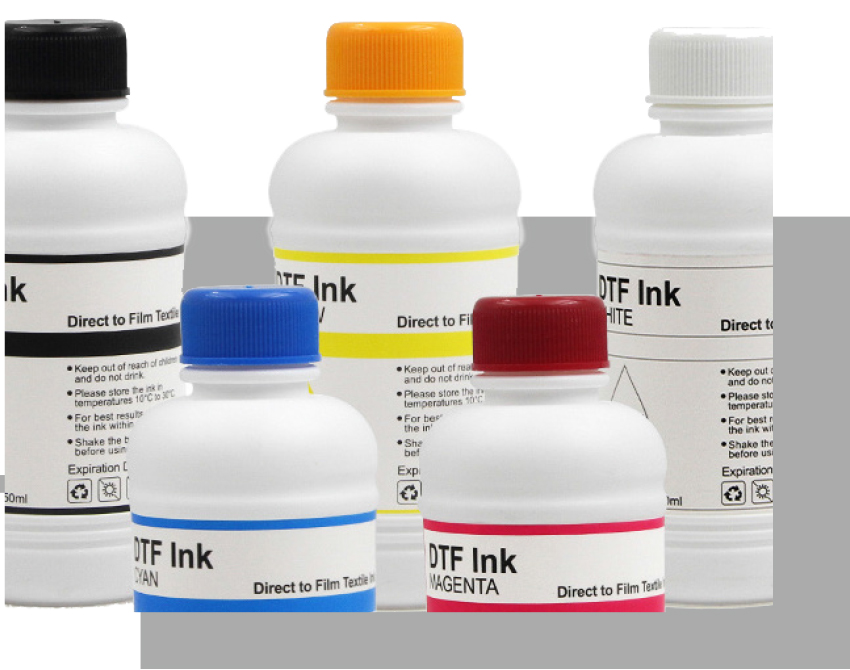
DTF Ink
DTF is a printer that uses a specific type of water-based ink to print on a transfer film/ foil. These are specially designed pigment inks that are available in cyan, magenta, yellow, black, and white colors.
Nevertheless, white ink is a special type of ink because the machine first prints the color inks on film, then with a few seconds delay it prints the white ink which creates a foundation on over the color inks.
This special order of the colors is very important since the hot melt adhesive powder sticks only to white ink and does not stick to color inks. This pigment ink formula has been formulated to reduce printhead clogging and drying.
However, the white ink pigment tends to settle down when not used frequently and therefore it should be shaken occasionally, preferably before every use.
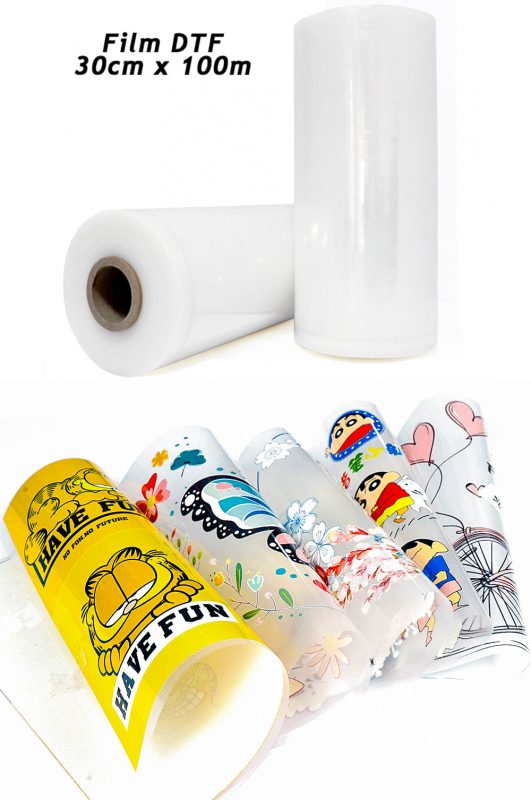
DTF Films
When it comes to film PET films are used for this specific type of printing.
These films are different compared to once used in screen printing. The thickness is approximately around 0.75 mm and has better transfer properties than the screen prints.
DTF films are available in the form of cut sheets (can be used for smaller-scale use) and rolls (allows to print continuously and longer).
Moreover, they also have another classification based on the type of peeling which is done after the transfer. This is based on the temperature; films can be either hot-peel type films or cold peel type films.
Last but not least, films can be one-sided, meaning one side is shiny and one is mate or double-sided, meaning both sides are mate.
The cut film sheets commonly used are in A4 format or A3 format as the roll can be 30-33cm x 100m long. However, originally the L1800 Epson printer can print A3+ format.
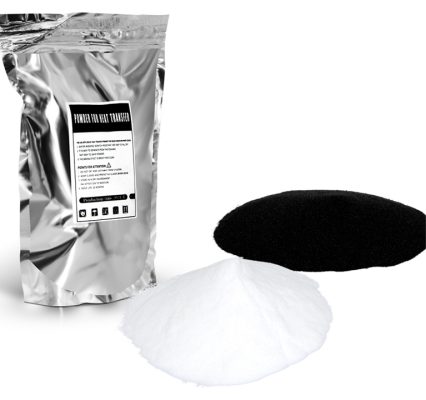
DTF Powder
There are two different color types of the hot-melt adhesive powder currently on the market.
A white powder which is used for lighter colored fabrics and black powder which is used for darker colored fabrics.
This type of powder acts as an adhesive material that binds the colored pigments in the print to the fibers in the fabric.
There are also different grades of the hot-melt powder that are specified in microns. Based on the requirements and type of fabric an appropriate grade of hot-melt powder can be chosen.
Nevertheless, there is also a difference in finishes, for example, some have elastic properties which are better to use on t-shirts, sweatshirts, and so on, and some types have more plasticky properties which suit best for jackets and heavy materials where elasticity is not needed.
Cleaning materials
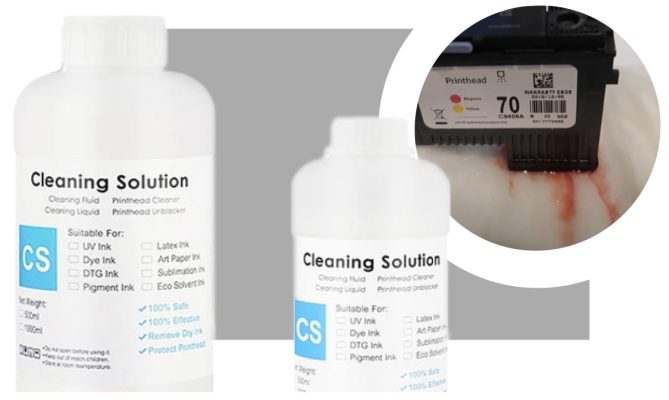
Dtf Inkt Cleaning
Because the DTF printer uses white ink, it is easy to block the print head. If you directly replace a new head, it will cost a lot of costs.
You can try this DTF cleaning liquid, which can clear the head blockage and allow you to continue to use the print head.
In addition to protection, it also moistens the nozzle, which prevents it from drying out. It has a longer expiration date, so it lasts longer.
It has super cleaning power and removes any unwanted residual ink.
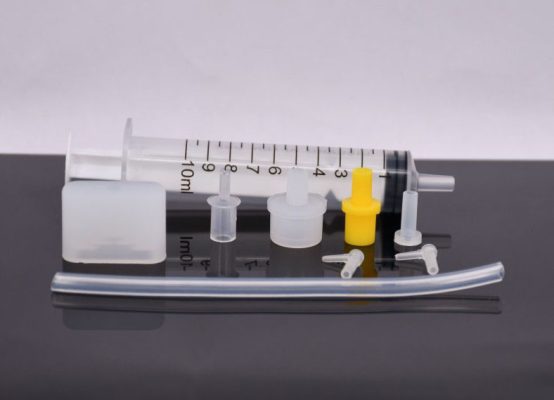
Syringe To Clean Printhead
When cleaning the printing machine it is very essential to have a cleaning kit.
This kit should contain a smaller and bigger syringe and come additional parts which can be added to the syringe to prolonger it and makes it easier to reach some complicated parts.
A syringe is very necessary to have in order to clean the printer, especially all the pipes where inks go. It easily injects the cleaning solution into the pipes and all the necessary parts and helps to clean.
DTF Printing Process
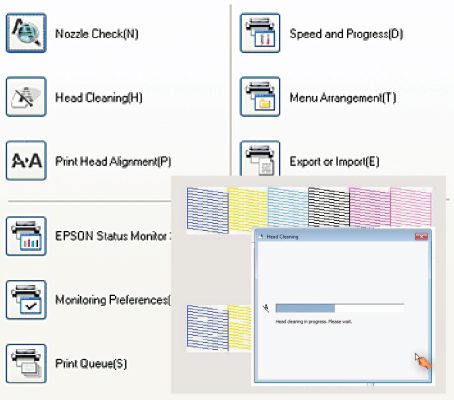
Print Head Cleaning
Before DTF printing, it is important to clean all tank pipes by clicking on “head cleaning”.
After completing the cleaning process, we will need to load the A4 film into the machine and print a color check sample to make sure that all the nozzles are working properly.
Once the nozzle check is successfully completed, we can start printing.
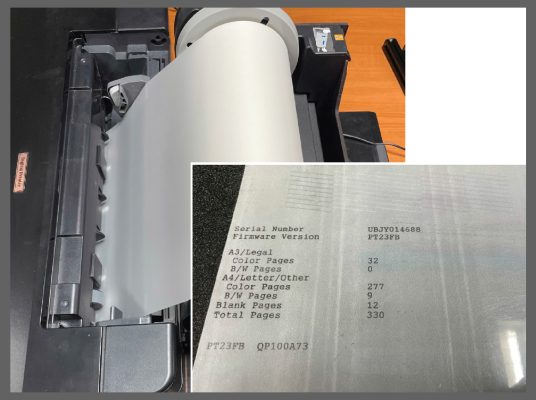
Instead of regular paper, we need to insert a PET film into the printer tray.
In the case of a roll, we must insert an A4 film and print a small sample of a white rectangle.
Then place the roll film on top of this A4 test film and slowly unwind it. As soon as the whole A4 film is out, we have to roll the piece of roll film back.
DTF Printing
When the film is ready, we need to open our RIP software, where we can adjust all the DTF printing properties.
We must first upload our PNG file to the software without a background. Size, color performance, drop size and other properties can be adjusted according to our desire.
The most important point to remember is that the design in the software must be a mirror design of the actual design that needs to appear on the fabric.
When we are satisfied, we are ready to print by sending it to the machine. DTF printing will begin
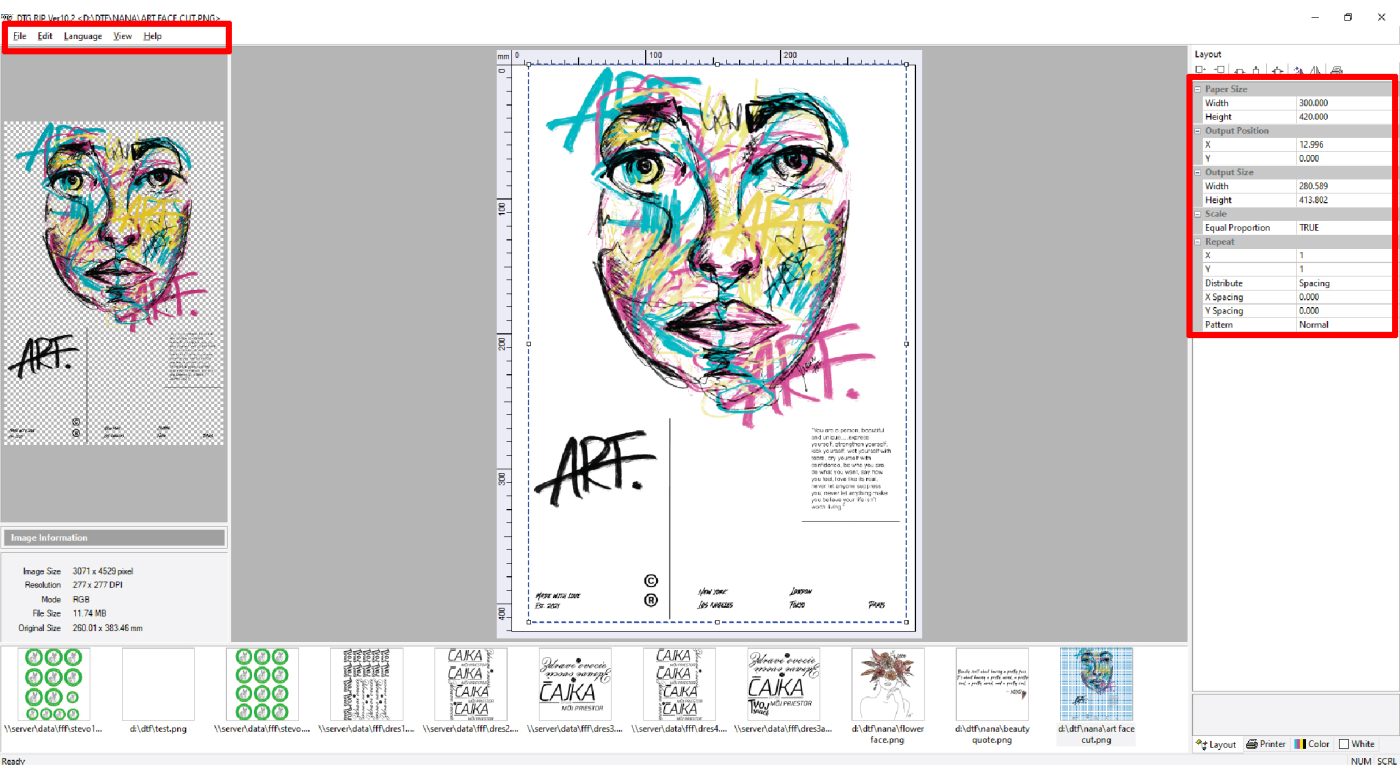
First of all, we need to upload our design as a PNG to the RIP software. Design parameters can be also adjusted.
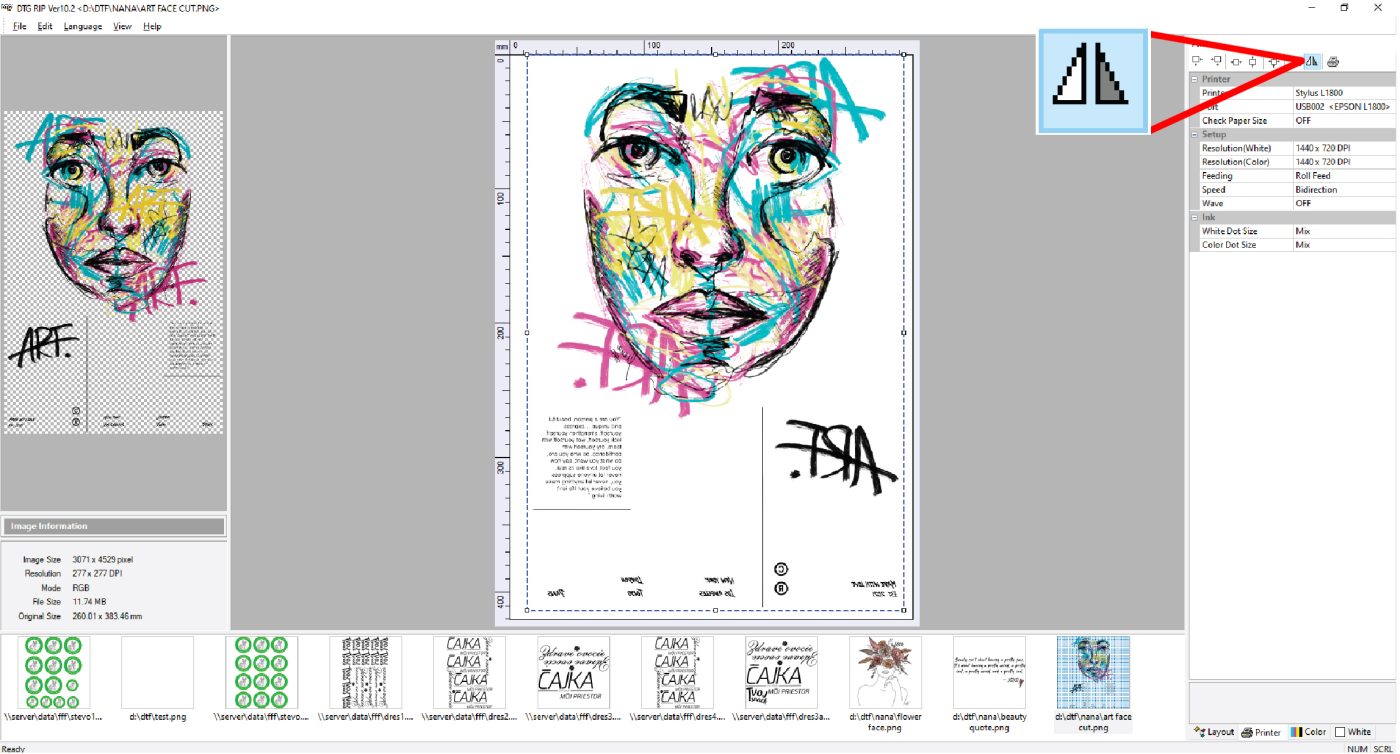
One of the most important step is to mirror the design.
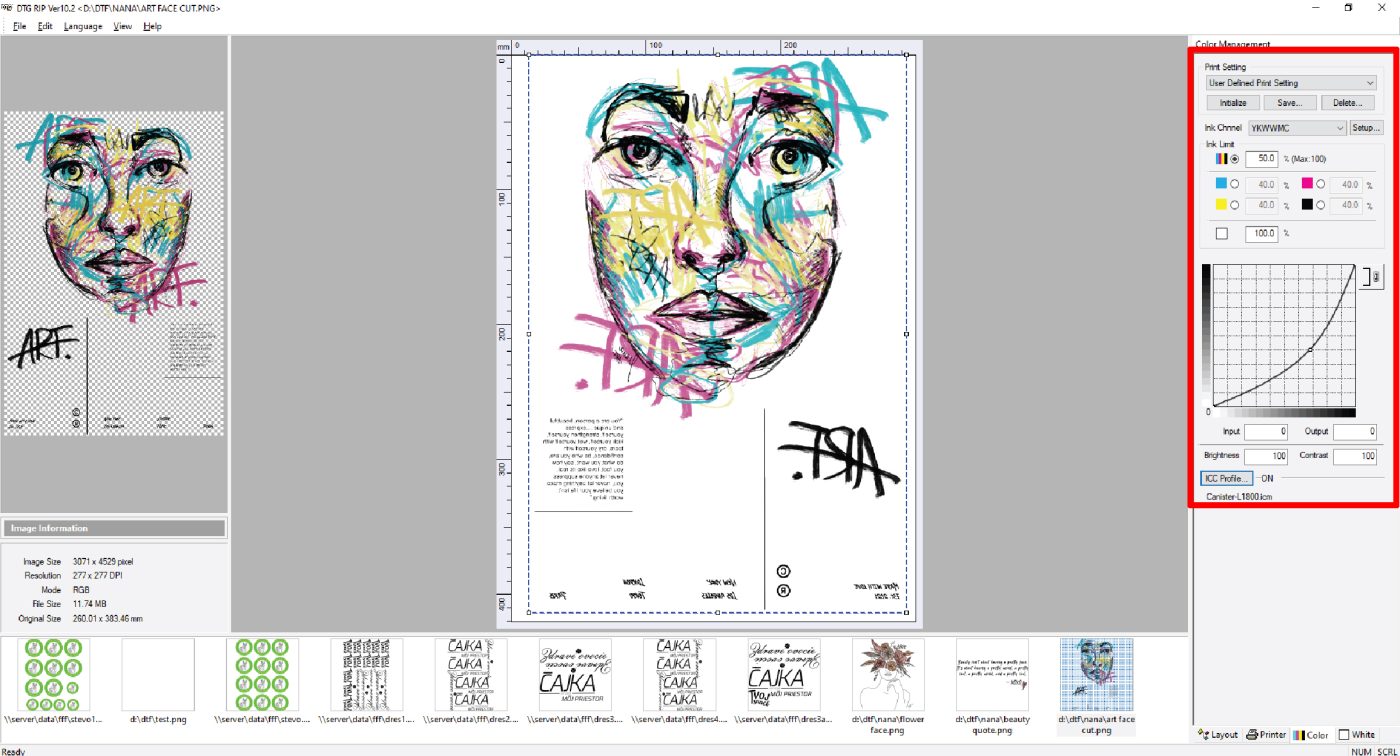
Every color parameter can be changed in this section.
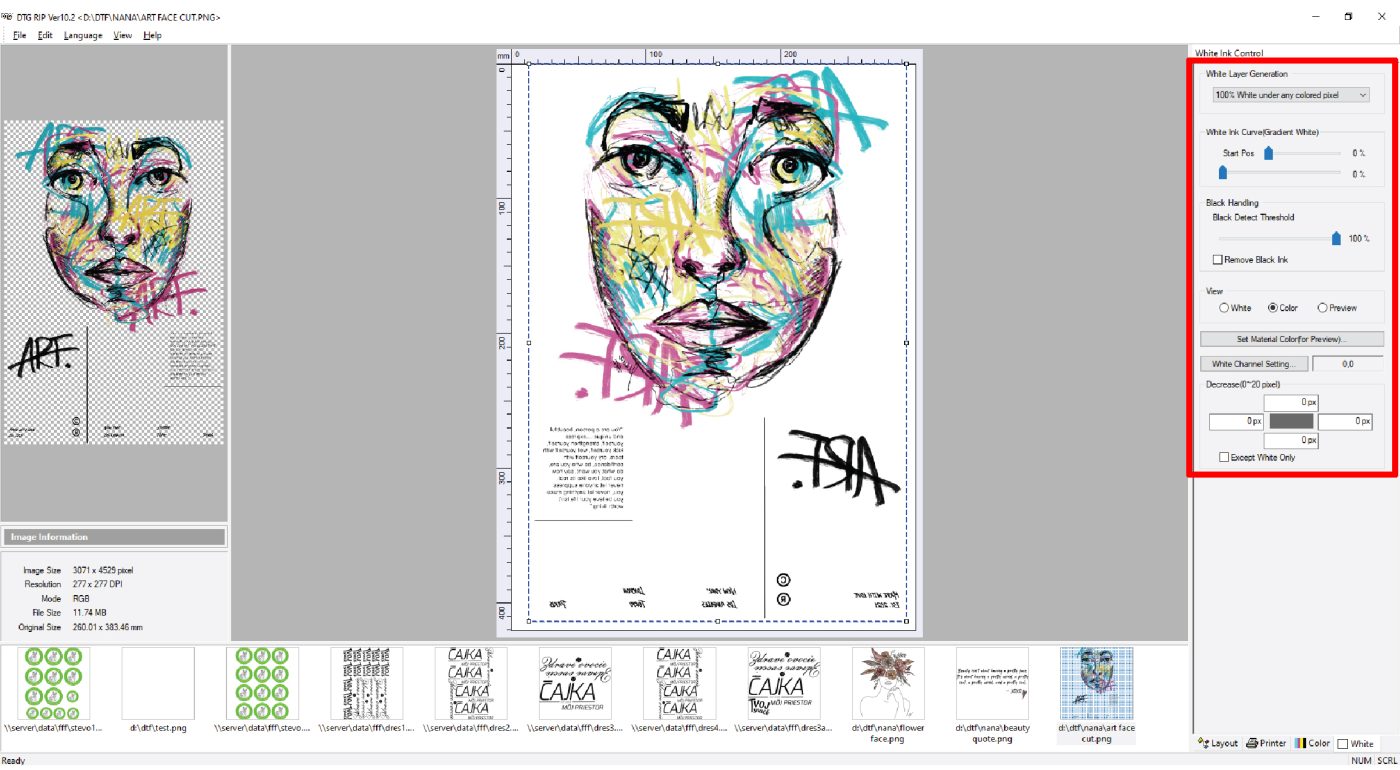
This section allows to control the parameters of white color.
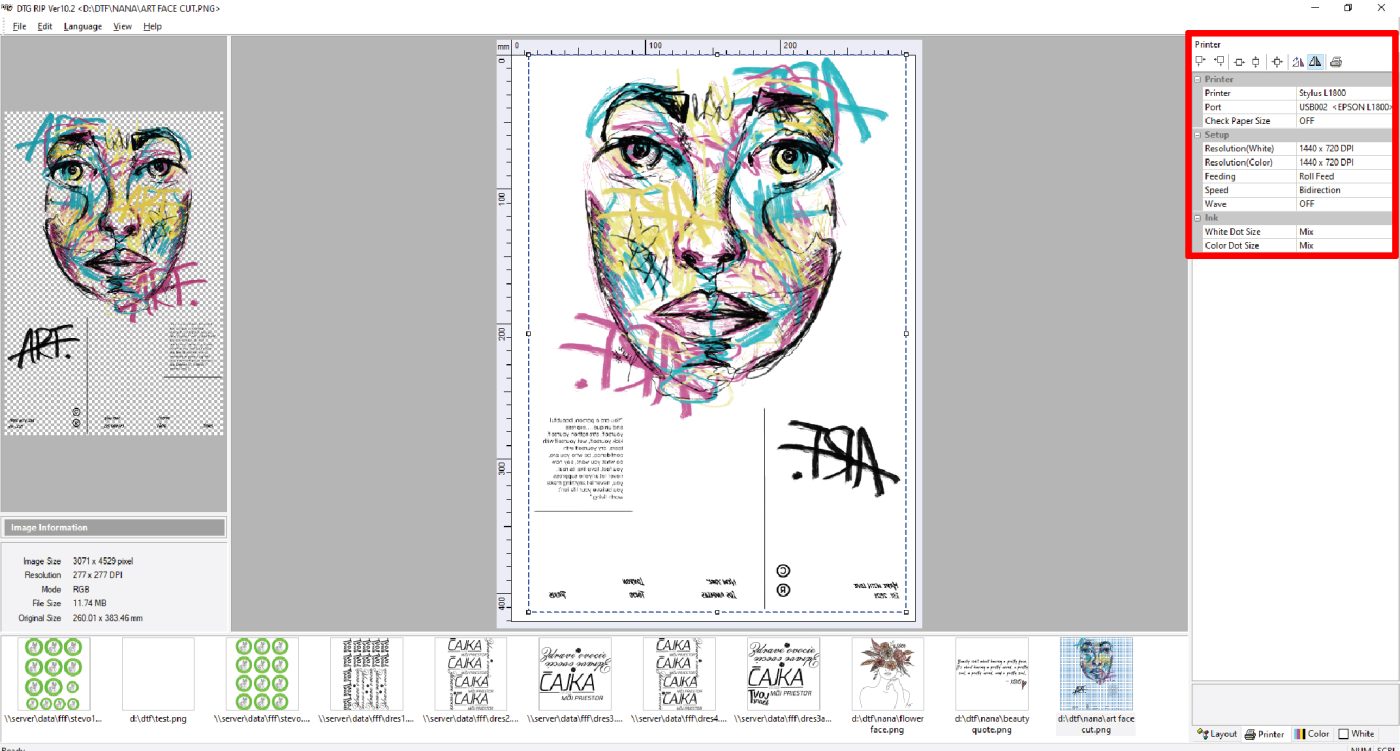
The droplet size of the colored + white inks can be adjusted.
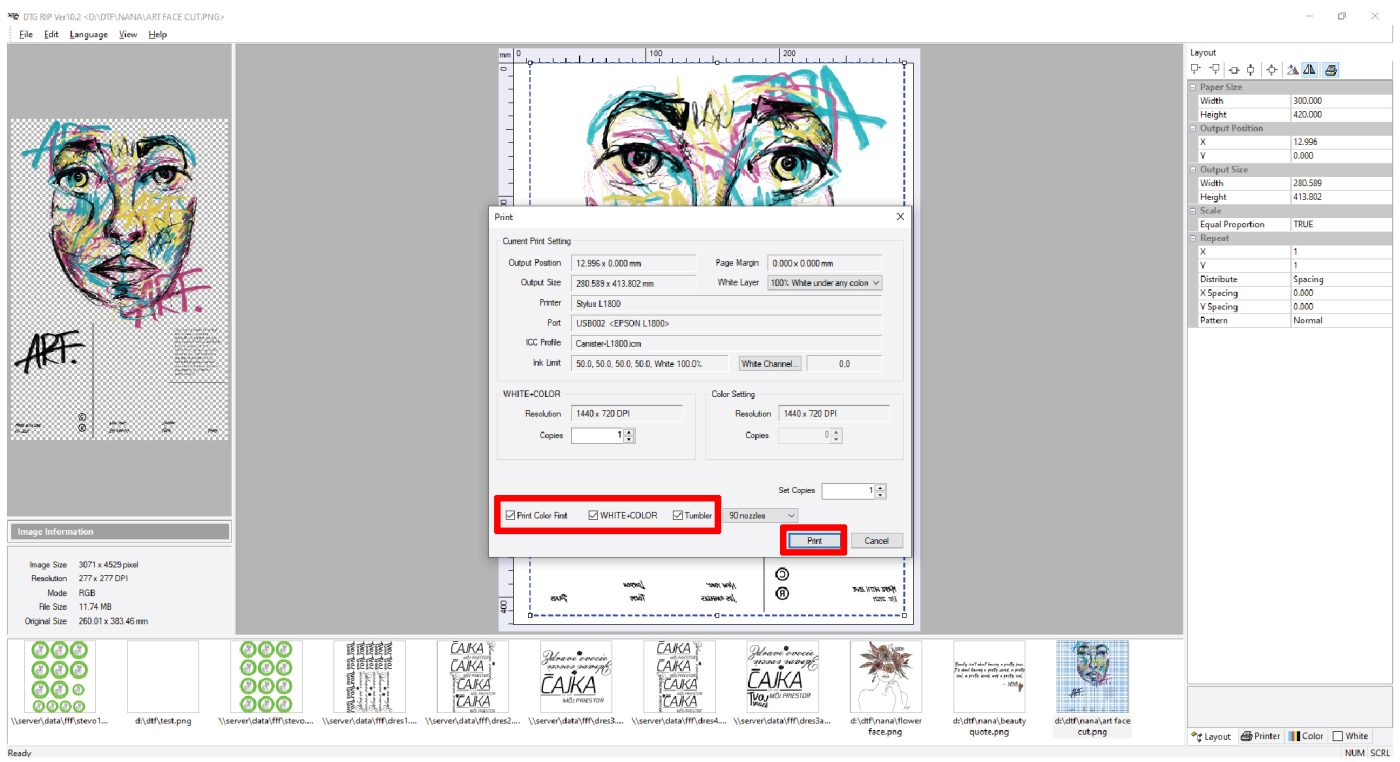
Before starting to print all of the little boxes need to be marked.
Covered The Powder
We need to make sure that the printed design is not fully wet but a bit dry in order to apply the hot melt powder to it.
The powder is applied uniformly when the print is semi-wet, and the excess powder needs to be removed carefully by small shaking movements.
Very important thing is to ensure that the powder is evenly spread all over the printed surface on the film.
One very common way to ensure that the powder is evenly spread is to hold the film at its short edges such that its long edges are parallel to the floor (landscape orientation) and pour the powder in the middle of the film from top to bottom such that it forms and a bit thick heap in the center (from top to bottom).
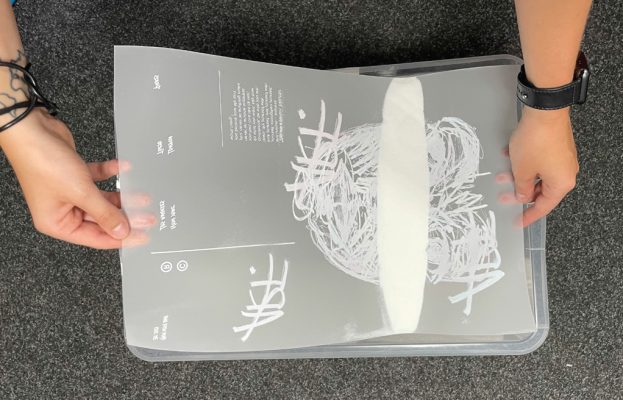
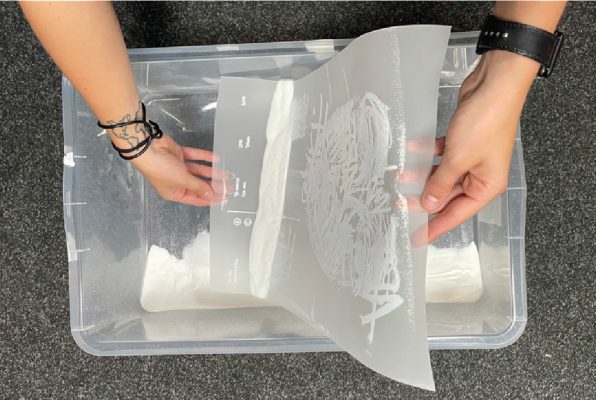
After we bend the film inwards such that it forms a slight U and move the powder from side to side until the whole printed surface is covered by the powder.
Lastly, we hold the film at one corner, and by flicking or we hold it at two corners and by small shaking movements we remove the access powder.
As an alternative, one can use automated shakers available for commercial setups.
If the design is too wet and we apply powder to it, the powder may move colors and they will get mix together
Melt The Adhesive Powder
The next step is to melt the adhesive powder by putting the film into the curing oven.
The curing over needs to have the temperature set around 160 to 170 degrees Celsius.
As soon as the oven is pre-heated, a film with printed design and powder can be put inside for about 2 to 5 minutes until all powder is melted.
In the case of using heat-press, there should be around a 4 to 7 mm gap between the film and heat press top plate.
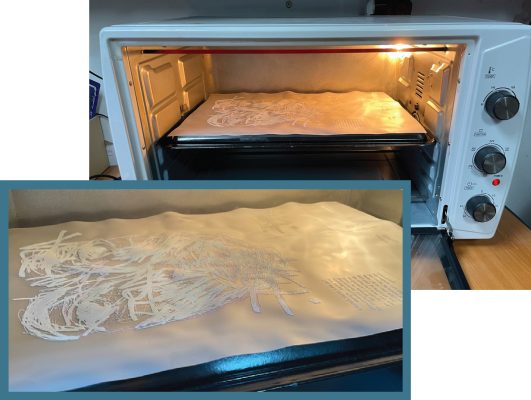
We have to be careful and remove the film from the oven before it burns. If the powder burns, it will cause the design to not adhere properly to the fabric.
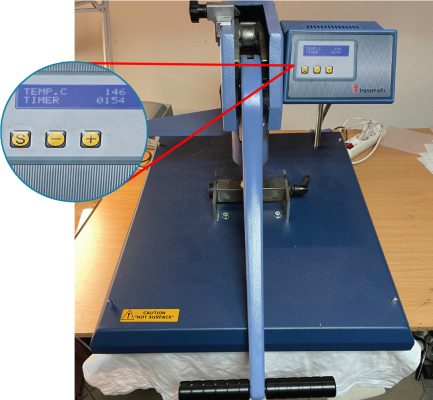
Pre-press The Fabric Surface
Before we transfer the design onto fabric, we need to pre-press the fabric’s surface.
The fabric is kept in the heat press for about 2 to 5 seconds at 150 to 160 degrees Celsius temperature.
This step is taken in order to flatten the fabric and also ensure the de humidification of the fabric. It also helps in the proper transfer of the design from the film onto the fabric.
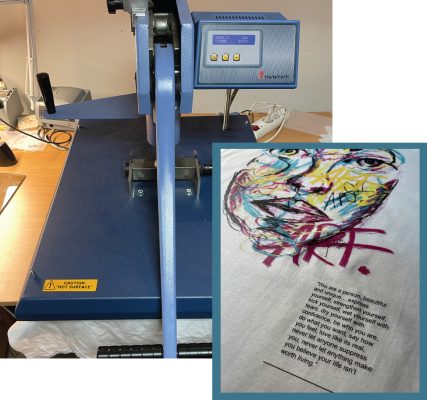
Transfer Design To Fabric
The film with printed design and melted powder is placed on top of the pre-pressed fabric according to our likings.
This process is also known as curing, and it is done at a temperature range of 150 to 160 degrees Celsius for approximately 15 to 20 seconds.
It can be secured by heat-resistant tape to ensure that the film won’t move during the transfer process.
Before removing the foil, we must make sure that it has cooled down to room temperature.
The hot melt has an amide-like nature, as it cools down, it acts as a binder that holds the color pigment in the attributes in firm adhesion to the fibers of the fabric.
Once the film is cooled, it can be peeled from the fabric and left with the desired design printed with ink on the fabric.
The film needs to be fully cooled down in order to be peeled off, otherwise, if it’s not cooled down properly parts of the design can be peeled off together with the film.
The final fabric with the transferred design is placed back in the heat press machine again to be pressed for approximately 10 to 15 seconds at the same temperature.
However, the printed design should be covered with greasy paper (this can be regular baking paper with greasy side facing the design) to prevent the design from being removed by the top plate of the heat press machine.
The last step is optional, but it is a very highly recommended step for best results and highperformance parameters like wash and rub fastness.
Pros / Cons of dtf printing
Pros Of DTF Printing
- Works with almost all types of fabrics
- Does not require pre-treatment of the fabric
- Faster process time and less tedious than DTG printing
- Printed designs exhibit good wash and rub characteristics
- Different properties of printed design with different hot melt powder
- Cost-effective DTF printing process
- Easy DTF printing manual
- No cracking when stretching the printed design
- Prints can be stored and heat pressed later
- DTF printer can be upgraded to be more automatic
Cons Of DTF Printing
- Color may differ when printed (can be enhanced by adjustment in RIP software)
- White color can be tricky to use/ maintain
dtf printer upgrade
Suction Table
This table has special suction fans that help paper remain in place during printing which results in smooth printing.
This prevents rolling, sliding, or jamming the foils.
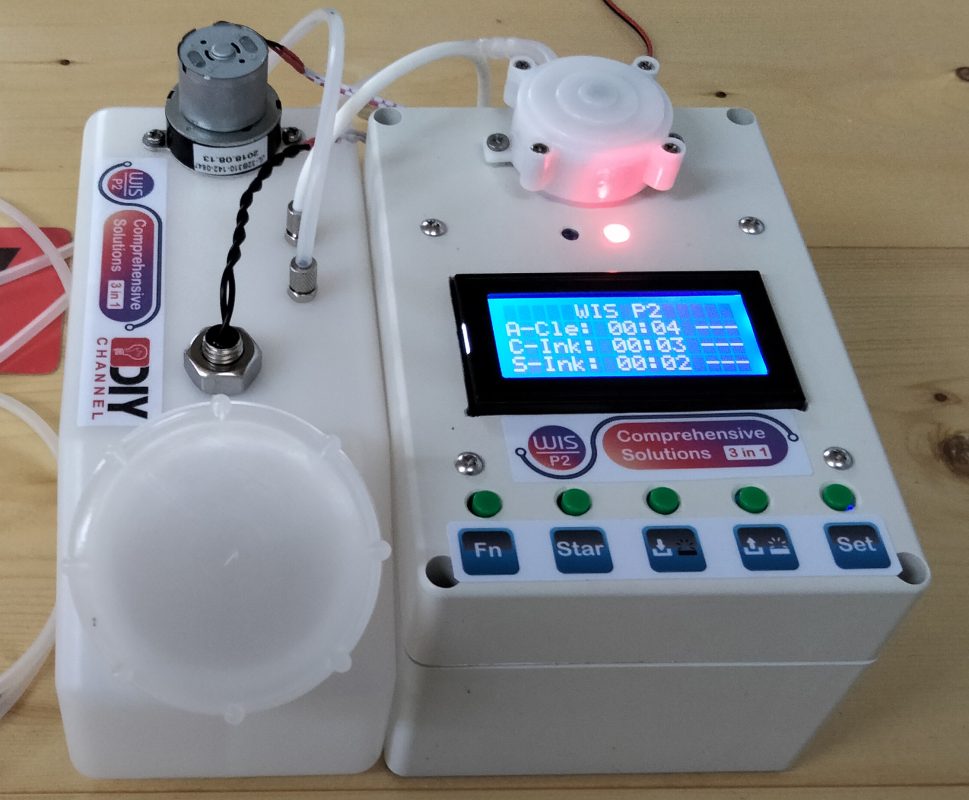
Printhead Cleaning And White Ink Management
This electronic system will have the function of automatic print head cleaning, white ink circulation and mix the white pigment color according to the set schedule.
This prevents the pigments from saddling on the bottom of the tank. in the ink tube. especially won’t clog the printhead of DTF printer.
Therefore, will ensure better DTF printing. Printhead has longer life.
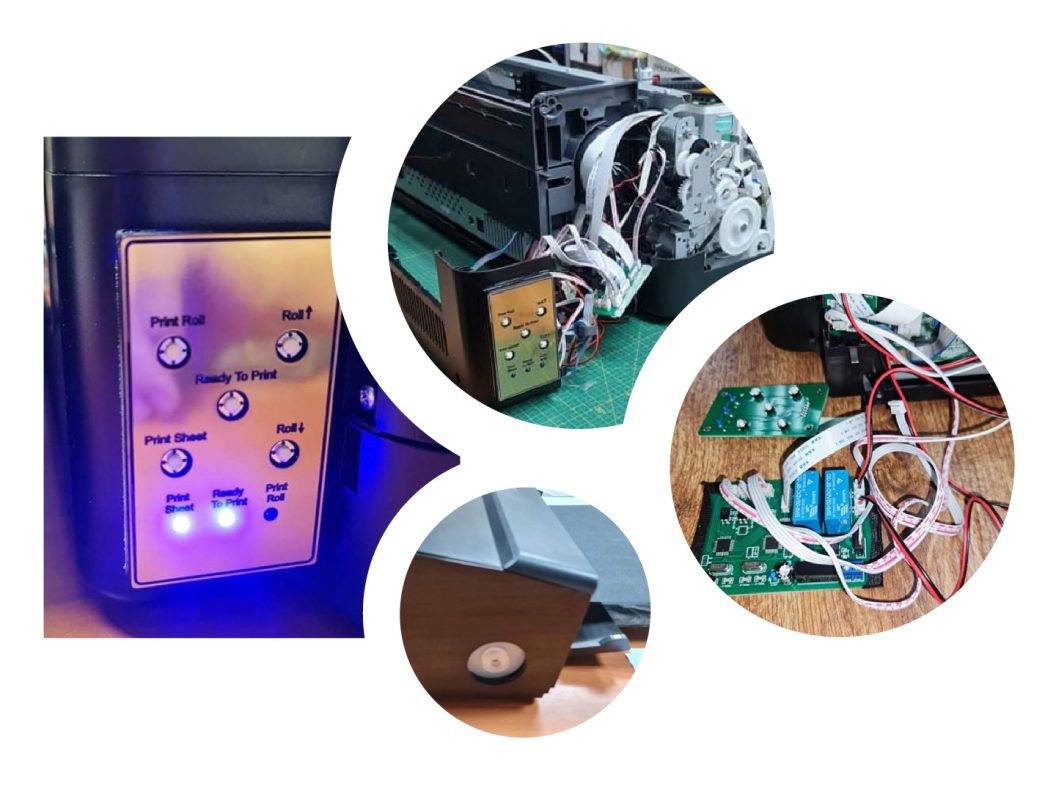
DTF printer controller and converter
Automatic Feeding
Automatic feeding helps especially when using a roll. also known as DTF printer controller and converter.
This allows you to unwind the foil to cut the printed part of the foil and roll the rest of the foil back to prepare it for further printing.
This helps to save time and is a great innovation, as originally the machine does not even have a manual winding that would allow the user to wind the foil in or out.
However, the manual winding can be installed as well not only the automatic winding.
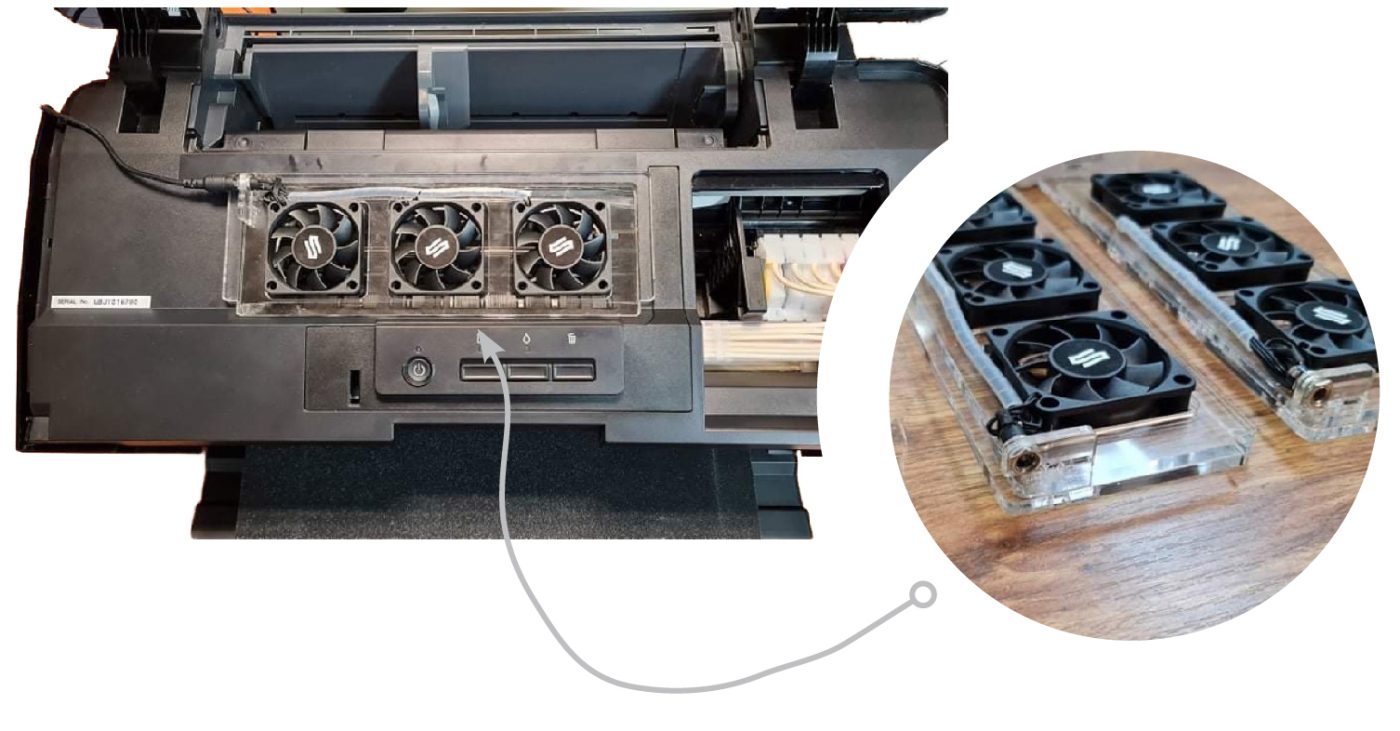
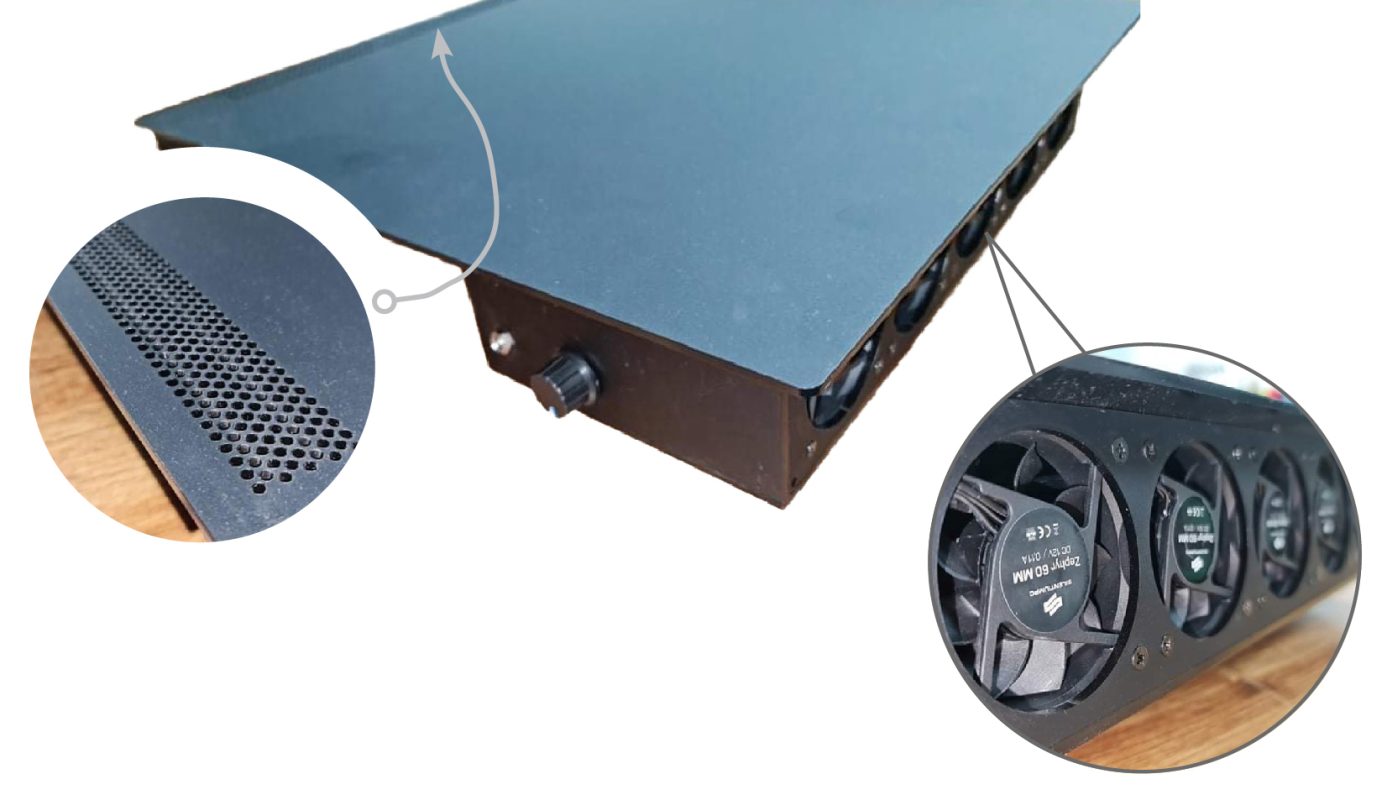
Dryer Fans
Another improvement that can be made on this printing machine is by dryer fans.
These fans are located on the top of the printer and help dry the print a little faster, especially when DTF printing full-color prints that require a bigger amount of colors.
This allows the hot melt powder to be applied immediately after printing without waiting for the ink to slightly dry.
Interview about DTF printing
In order to get to know the machine and its properties furthermore, I have arranged an interview with an owner of a company that is transforming, selling, and using the DTF printing machine itself.
Due to privacy, the owner did not want to be mentioned in this interview, and therefore I will refer to him as he/ him/ the owner.
Reflection
Being a very creative person, I love the more creative side of my studies along with the business sector. I have always enjoyed exploring and learning about the different types of printers that can be used to trade clothing.
When I discovered that a new machine was on the market, I was immediately interested in learning more about it. I am most interested in some information, such as the price and practical simplicity of the DTF printer.
However, the fact that an ordinary Epson L1800 printer can be converted into a DTF printer interests me more. Therefore, I researched out converters for DTF printers.
A DTF printer can be purchased as converted to a DTF or, if people are skilled enough, it can be purchased as a regular printer and then remodeled, thus saving some money.
DTF printers provide high quality prints. It shows the color and fabric perfectly. These DTF printers are especially known for their efficiency in producing the most subtle tones on both light and dark fabrics compared to other fabric printers.
In particular, the white color ensures the right density to match the printed color at optimal ink consumption.
Overall, I would say that DTF printers remove all the limitations that we often encounter in other textile printing processes, especially when it comes to the selection of fabrics for printing.
Due to the fact that no pre-processing is required, in many cases total printing costs are reduced, thus providing higher profit margins.
The DTF printing process is a very efficient way to produce printed fabrics more economically.
Good luck in your DTF printing!
If you need any help please feel free to contact me.
Contact information is available below
Written by NATÁLIA DOBIAŠOVÁ
Learn about 2 color systems RGB and CMYK
Epson Printhead Technology
Compare thermal bubble jet print head and piezo electrically actuated inkjet printhead
Cause Printer clogged printhead? How To Treat It Thoroughly
Advantages and disadvantages of DTF, sublimation, dtg and silkscreen printing methods