
Epson WF-7511 WF-7521 WF-7018 Adjustment Program
Original price was: 8 $.5 $Current price is: 5 $.
Epson WorkForce WF-7511, WF-7521, and WF-7018 are popular wide-format printer models favored by many business and home users. However, after a period of operation, these printers might stop functioning and display error messages such as “Service Required,” “A printer’s ink pad is at the end of its service life,” or their indicator lights blinking alternately. This indicates that the printer’s waste ink counter has reached its allowed limit. To fix this error and restore your printer to normal operation, you’ll need to use the dedicated Adjustment Program software.
Fixing “Service Required” or “Waste Ink Pad Full” on Epson WorkForce WF-7511, WF-7521, WF-7018 with Adjustment Program Software
Epson WorkForce WF-7511, WF-7521, and WF-7018 are popular wide-format printer models favored by many business and home users. However, after a period of operation, these printers might stop functioning and display error messages such as “Service Required,” “A printer’s ink pad is at the end of its service life,” or their indicator lights blinking alternately. This indicates that the printer’s waste ink counter has reached its allowed limit. To fix this error and restore your printer to normal operation, you’ll need to use the dedicated Adjustment Program software.
What is the Adjustment Program and its importance for the Epson WF-7511/WF-7521/WF-7018?
The Adjustment Program (also known as a service program or reset utility) is an internal software tool provided by Epson (or third-party developers) for service technicians. This software allows access and deep adjustment of the printer’s settings, particularly managing the lifetime counters of its components.
For the Epson WorkForce WF-7511, WF-7521, and WF-7018 printers, the core and most critical function of the Adjustment Program is to reset the Waste Ink Pad Counter. All Epson inkjet printers have a special internal ink pad to absorb excess ink generated during print head cleaning cycles and printing operations. To prevent the waste ink from overflowing and potentially damaging internal electronic components, Epson integrates a counter. When this counter reaches its safe threshold (usually 100%), the printer automatically locks down and displays an error, requesting maintenance. This is a built-in protective mechanism from the manufacturer.
The Adjustment Program software will help you to:
- Reset the Waste Ink Counter: Set this counter back to zero, making the printer “believe” that the ink pad has been cleaned or replaced, thus allowing it to resume printing.
- Perform in-depth maintenance tasks: Besides resetting the counter, the software can also offer options to check printer status, Print Head Alignment, Nozzle Checks, and other service functions to optimize printing performance and quality.
Basic Steps to Reset Your Epson WorkForce WF-7511/WF-7521/WF-7018 Using the Adjustment Program:
- Download the software: Search for and download the Adjustment Program version compatible with your Epson WorkForce WF-7511, WF-7521, or WF-7018 printer model from reputable sources. Be aware that some versions of this software may require the purchase of an activation code (reset key) to enable the counter reset function.
- Prepare your printer and computer:
- Close all applications currently using the printer.
- Connect your Epson printer to your computer using a USB cable (not via Wi-Fi or LAN) and ensure the drivers are fully installed.
- Important: Temporarily disable your computer’s antivirus software or Windows Defender, as they often identify the Adjustment Program as a threat due to its deep system interaction.
- Run the software: Extract the downloaded file (usually .zip or .rar) and run the executable of the Adjustment Program (typically
AdjProg.exeor a similarly named file) as an Administrator (right-click and select “Run as administrator”). - Perform the reset:
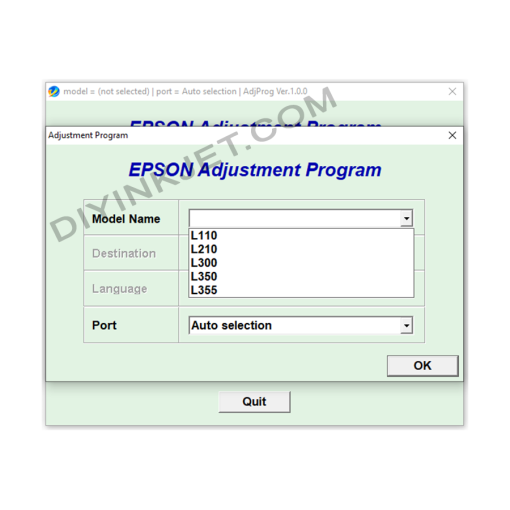
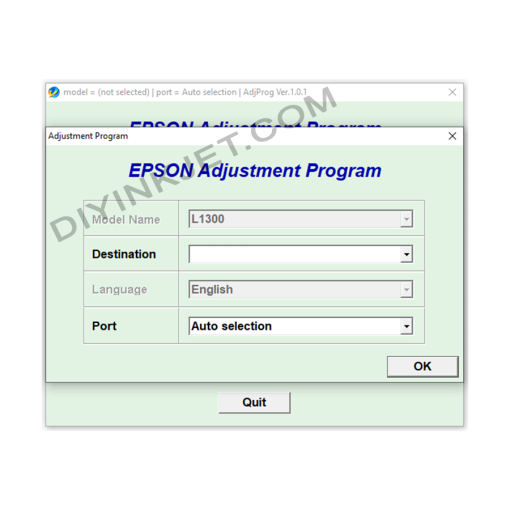
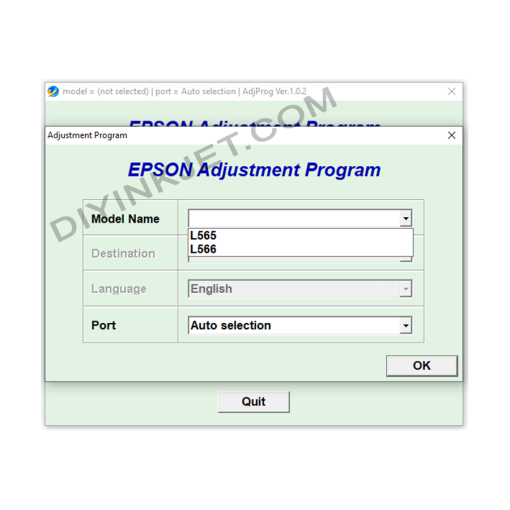
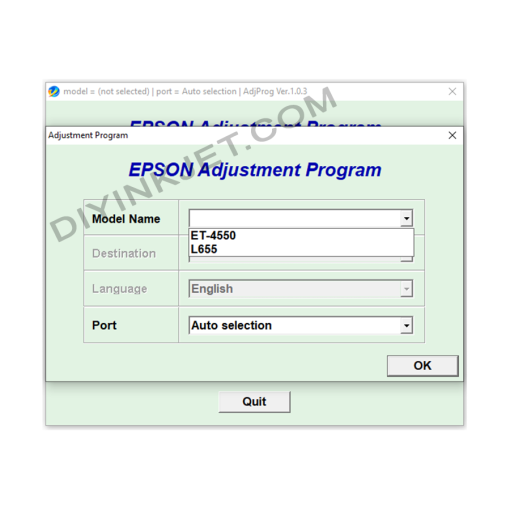
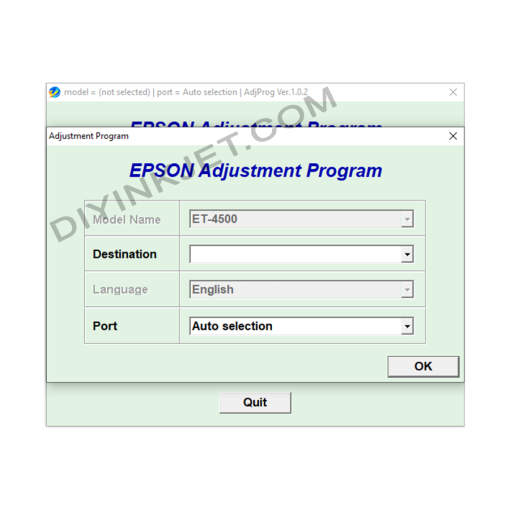
- In the software interface, click “Select” and ensure you choose the correct printer model (WF-7511, WF-7521, or WF-7018). For “Port,” you can usually select “Auto selection” or choose the correct USB port to which the printer is connected. Then click “OK”.
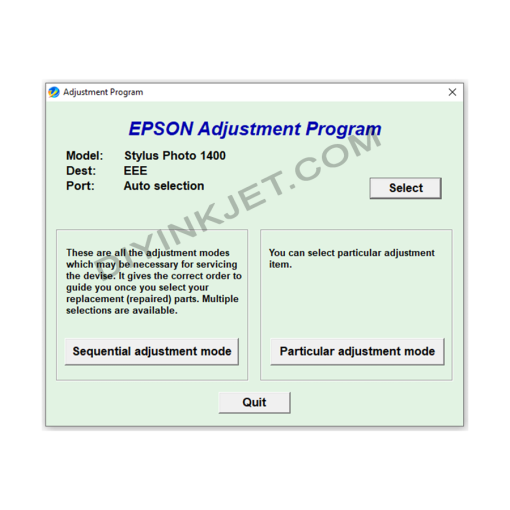
- Next, click on “Particular adjustment mode”.
- In the new window that appears, find and select “Waste Ink Pad Counter” and click “OK”.
- Under “Check & Initialization,” check the boxes for “Main pad counter” and “Platen pad counter” (if present).
- Click “Check” to see the current counter values (which will usually be near 100% or over 100%).
- After checking, re-check the same boxes and click “Initialization”. A confirmation dialog will appear; click “OK”.
- The software will indicate that the reset process is complete and prompt you to turn off the printer.
- Restart the printer: When you receive the message, you must turn off the printer, unplug the power cord, wait for about 5-10 seconds, then plug it back in and turn the printer on. Your printer should restart, and the “Service Required” error will disappear, allowing you to resume normal printing. You can re-check the counter by clicking “Check” again to confirm it’s at 0%.
Important Notes and Recommendations:
- Reliable Download Source: The Adjustment Program is not official software widely distributed by Epson to end-users. Therefore, exercise extreme caution when downloading. Prioritize reputable printer repair websites or tech forums.
- Purchase Activation Code (if required): Many versions of this reset software require the purchase of an activation code to enable the reset function. This code typically works for a single reset on one printer.
- Physical Waste Ink Pad Issue: Resetting the counter is solely a software solution. The physical waste ink pad inside the printer will still be saturated with ink. To ensure the safety of your printer and prevent waste ink overflow that could cause damage to electronic components, you should consider cleaning or replacing the physical waste ink pad after resetting the counter. If not, waste ink could overflow and cause serious damage to your printer over time.
- Stable Power Supply: Ensure a stable power supply throughout the reset process to avoid interruptions that could lead to firmware errors for the printer.
- Follow Instructions Carefully: Always seek and follow detailed instructions (in text or video format) specifically for your Epson WF-7511, WF-7521, or WF-7018 model, as different software versions may have slightly different interfaces or steps.
Using the Adjustment Program software carefully and correctly will help you effectively resolve the “waste ink counter overflow” issue, save on repair costs, and maintain optimal operational performance for your Epson WorkForce WF-7511, WF-7521, and WF-7018 printers.
Related products
Epson Adjustment Program
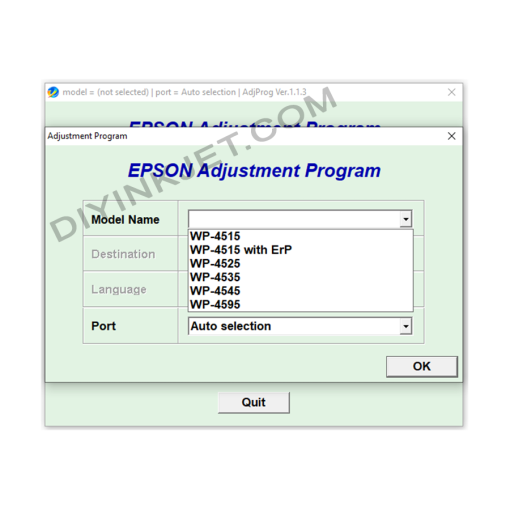
Epson WF-4515 WF-4525 WF-4535 WF-4545 WF-4595 Adjustment Program
Epson Adjustment Program
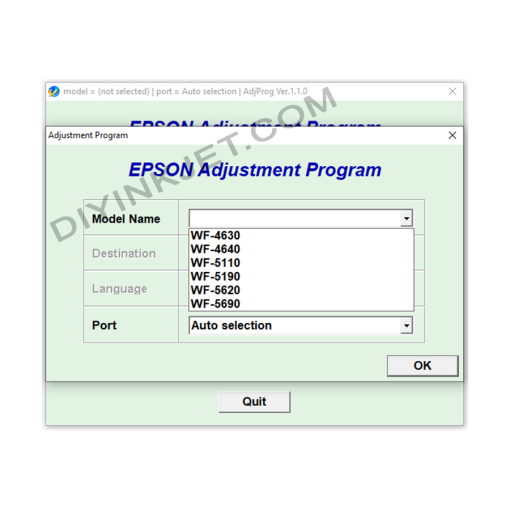
Epson WF-4630 WF-4640 WF-5110 WF-5190 WF-5620 WF-5690 Adjustment Program
Epson Adjustment Program
Epson Adjustment Program
Epson Adjustment Program
Epson Adjustment Program
Epson Adjustment Program
Epson Adjustment Program