Subtotal: 6 $
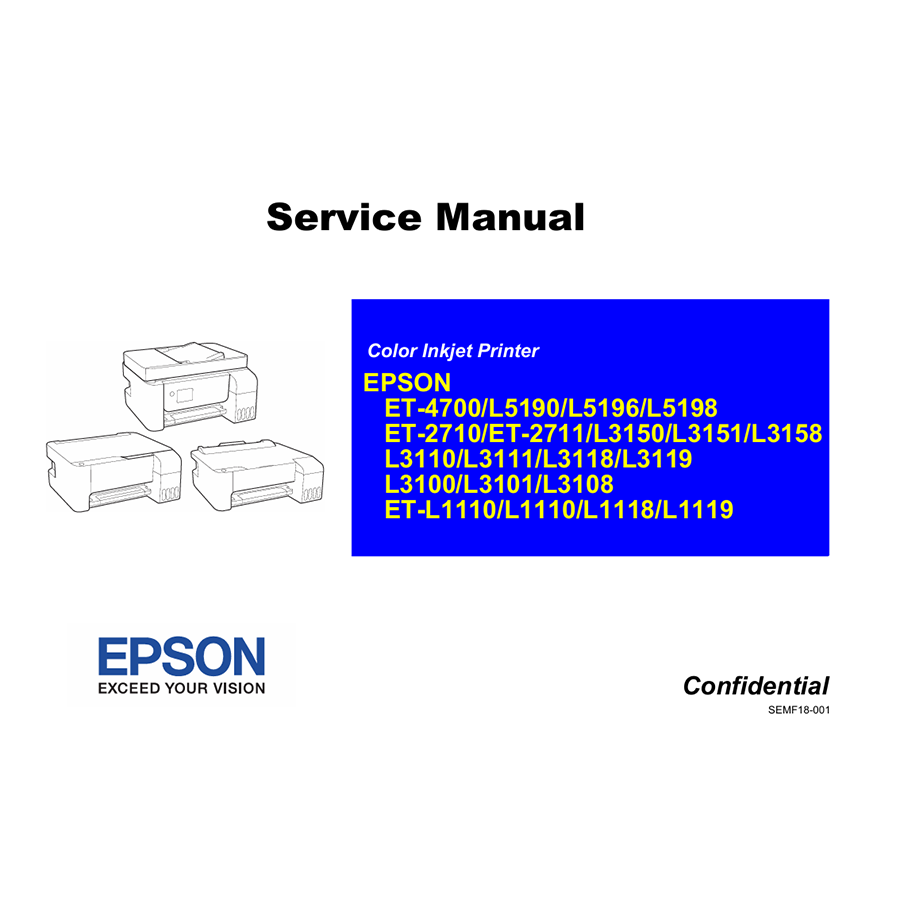
Epson Service Manual: The Advanced DIY Repair Guide for Your Epson EcoTank L5198, L31xx & L111x Series Inkjet Printers
9 $ Original price was: 9 $.6 $Current price is: 6 $.
For households and small businesses prioritizing efficiency, convenience, and the exceptional low-cost printing of the EcoTank system, the Epson EcoTank L5198, L3151, L3158, L3118, L3119, L3108 (L31xx Series), L1118, and L1119 (L111x Series) printers have become a staple.
For households and small businesses prioritizing efficiency, convenience, and the exceptional low-cost printing of the EcoTank system, the Epson EcoTank L5198, L3151, L3158, L3118, L3119, L3108 (L31xx Series), L1118, and L1119 (L111x Series) printers have become a staple. These modern inkjet printers are celebrated for their sleek, integrated ink tank design, intuitive operation, and robust features like Wi-Fi and Wi-Fi Direct connectivity. While engineered for reliable daily use, like any piece of sophisticated electronics, your printer can occasionally encounter issues that disrupt your productivity or print quality.
Instead of incurring expensive professional repair costs or considering a premature replacement, imagine having the precise technical knowledge to diagnose, calibrate, and resolve problems yourself. This is exactly what the Epson L5198, L31xx, L111x Series Inkjet Printer English Service Manual provides – your ultimate resource for effective repair and meticulous maintenance of these popular EcoTank printers.
What is the Epson L5198, L31xx, L111x Series Service Manual?
The Epson L5198, L31xx, L111x Series Service Manual is Epson’s official, highly detailed technical document created specifically for this range of modern EcoTank inkjet printers. Significantly more comprehensive than the basic user manual, which focuses on setup and everyday operations, this service manual is indispensable for trained service technicians and ambitious DIY enthusiasts. It offers an in-depth exploration of the intricate mechanical, electrical, and firmware systems that power these printers, including their compact design and advanced connectivity features. Essentially, it serves as the definitive blueprint, guiding you through every step of understanding, troubleshooting, disassembling, calibrating, repairing, and accurately reassembling your L5198, L31xx, or L111x series printer to maintain its optimal performance.
Key Repair Information and Contents You’ll Discover Inside
This comprehensive service manual is a goldmine of technical data, absolutely vital for anyone looking to perform in-depth maintenance or repairs on their Epson EcoTank printer from this series. You can expect to find:
- Product Description and Specifications: A thorough overview of the various models covered within this series, outlining their features, detailed technical specifications (e.g., print speed, resolution, paper handling, Wi-Fi, Wi-Fi Direct, and for the L5198, ADF (Automatic Document Feeder) and Fax capabilities), and core components. It highlights their Piezoelectric print head technology and the advanced integrated ink tank system, often with unique key-lock nozzles for truly spill-free refilling.
- Operating Principles / Theory of Operation: Detailed explanations of how the printer’s various mechanisms function, particularly focusing on their more integrated design. This includes:
- The precise ink delivery system (how ink flows from the internal tanks to the print head).
- The intricate operation of the print head and carriage movement.
- Paper feeding mechanisms, including sensors for paper size detection, and for multifunction models, the mechanics of the flatbed scanner and ADF.
- Crucial maintenance box (waste ink pad) management, including detailed information about its functionality and the process for replacement and counter reset.
- Safety Information: This section is paramount. Working with electrical components, delicate moving parts, and liquid ink requires extreme caution. The manual provides explicit warnings and precautions, emphasizing how to safely disconnect power, handle sensitive electronic components (like the main board and print head), and prevent ink spills or exposure. Always prioritize your safety by carefully reading and following these guidelines.
- Disassembly and Assembly Procedures: Step-by-step, clearly illustrated instructions guiding you through the safe and correct method for taking apart and putting back together every section of your printer. This is crucial for accessing internal components such as the print head, paper rollers, sensors, or logic boards for cleaning, inspection, or replacement. Special attention is typically given to the compact internal layout and potentially integrated components.
- Troubleshooting Guides: Extensive sections dedicated to diagnosing common problems. These are often presented with logical flowcharts and tables, helping you pinpoint the root cause of an issue based on observed symptoms or error codes. This includes:
- Error Code List: A comprehensive enumeration of all diagnostic error codes that your printer might display on its LCD screen (if present) or via status lights, detailing their meaning and recommended steps for resolution. Issues like “Maintenance Box Near Full” or “Service Required” are thoroughly addressed, often requiring a maintenance box replacement and counter reset.
- Print Quality Issues: In-depth guidance on troubleshooting and resolving common print defects such as banding, missing lines, faded colors, streaks, blurry prints, incorrect color output, or smudging. Solutions often involve specific cleaning cycles, print head alignments (including bidirectional alignments), or identifying component failures.
- Paper Handling Problems: Solutions for various paper jams (including instructions on how to safely clear them), misfeeds, or issues with paper not picking up correctly from the input tray or, for ADF-equipped models, issues with document feeding.
- Ink System Issues: Specific troubleshooting for ink flow problems, air bubbles in ink tubes, or difficulties with the integrated ink tank system.
- Connectivity Issues: Guidance on troubleshooting Wi-Fi and Wi-Fi Direct connection problems.
- Adjustment Procedures: Provides precise instructions for calibrating various parts of the printer after repairs or component replacements to ensure optimal print quality, consistent paper feeding, and overall performance. This includes print head alignment, paper feed adjustments, and sensor calibrations.
- Maintenance Procedures: Guidelines for preventive maintenance, including routine cleaning instructions for the print head, capping station, rollers, and internal components. Crucially, it will also detail how to manage and reset the waste ink counter or replace the maintenance box, which is a frequent and necessary maintenance requirement for these EcoTank models.
- Circuit Diagrams and Wiring Diagrams: For those with electronics expertise, these detailed diagrams provide a visual representation of the printer’s electrical systems, component layouts on printed circuit boards (PCBs), and precise wiring connections, enabling advanced electrical diagnostics.
- Exploded Diagrams and Parts List: Visual breakdowns of the printer’s various assemblies, showing every component in an exploded view with its corresponding part number. This is incredibly useful for identifying and ordering the correct replacement parts from suppliers like diyinkjet.com.
Why This Epson Service Manual is an Indispensable Repair Resource
For dedicated owners and DIY enthusiasts working with the Epson EcoTank L5198, L31xx, or L111x series printers, this service manual offers profound benefits:
- Significant Cost Savings: Empower yourself to perform many common maintenance tasks, calibrations, and repairs in-house, drastically reducing expenses on external technician visits and costly service contracts. This is especially valuable for models no longer under warranty.
- Minimized Downtime: Quickly identify and resolve issues, getting your essential printer back into operation faster and minimizing disruption to your personal or business printing needs.
- Extended Printer Lifespan: Proactive maintenance and accurate repairs, guided by official procedures, help maximize the operational life of your valuable EcoTank investment, making it a truly sustainable choice.
- Empowerment Through Knowledge: Gain a deep and practical understanding of your printer’s advanced EcoTank technology and internal mechanisms, leading to greater confidence in tackling future problems independently.
- Sustainable Practices: Repairing and extending the life of your equipment rather than discarding it contributes positively to reducing electronic waste and promotes a more environmentally responsible approach to technology.
Related products
Epson Service Manual
Epson Service Manual
Epson Service Manual: The Ultimate Guide for DIY Plotter Repair (Epson 11880, 11880C Plotters)
Epson Service Manual
Epson Service Manual: The Advanced Guide for Your Epson EcoTank L41xx & L61xx Series Inkjet Printers
Epson Service Manual
Epson Service Manual: The Essential Repair Guide for Your Epson EcoTank L120 Inkjet Printer
Epson Service Manual
Epson Service Manual
Epson Service Manual
Epson Service Manual: The Definitive English Repair Guide for Your Epson EPL-9000 Laser Printer
Epson Service Manual
Epson Service Manual: The Definitive Guide for Your Epson LQ-670K (and LQ-670) Dot Matrix Printer

 Epson L15158 L15168 L15150 L15160 C8000 16600 16650 Color Inkjet Printer English Service Manual